Adjusting the Maximum Transmission Unit (MTU) size to optimise your PC’s internet or network speed…
The MTU (Maximum Transfer Unit), which basically determines how much data your device can send with each “package” is set to a strange value in some routers. We have noticed that in some cases the routers MTU has a default setting of 1400, while most other devices and networks have a standard value of 1500. This can lead to bad connections and slow download speeds.
If your not very tech savvy or you don’t want to go through the rigmarole of optimising your MTU, then you can simply change the value in your router settings:
Open your router settings > Select “Internet” or “Internet Settings” then scroll down to MTU. Select this and change the number to 1500 (this is the default for most networks in the world). If that setting isn’t available then you will need to manually set the MTU in your computer.
As a rule of thumb, a larger MTU size will increase bulk protocol throughput. Fewer packets with the same amount of data are processed when the MTU size is increased. However, a smaller MTU size will result in more overhead and acknowledgements that must be sent and received.
In order to optimise your system we first need to know what the MTU size on your machine and what the optimum value should be set at….
To see the MTU size on your computer open a command line or DOS/PowerShell window and input the following command without the quotes:
“netsh interface ipv4 show subinterfaces” using this command line my MTU was 1500
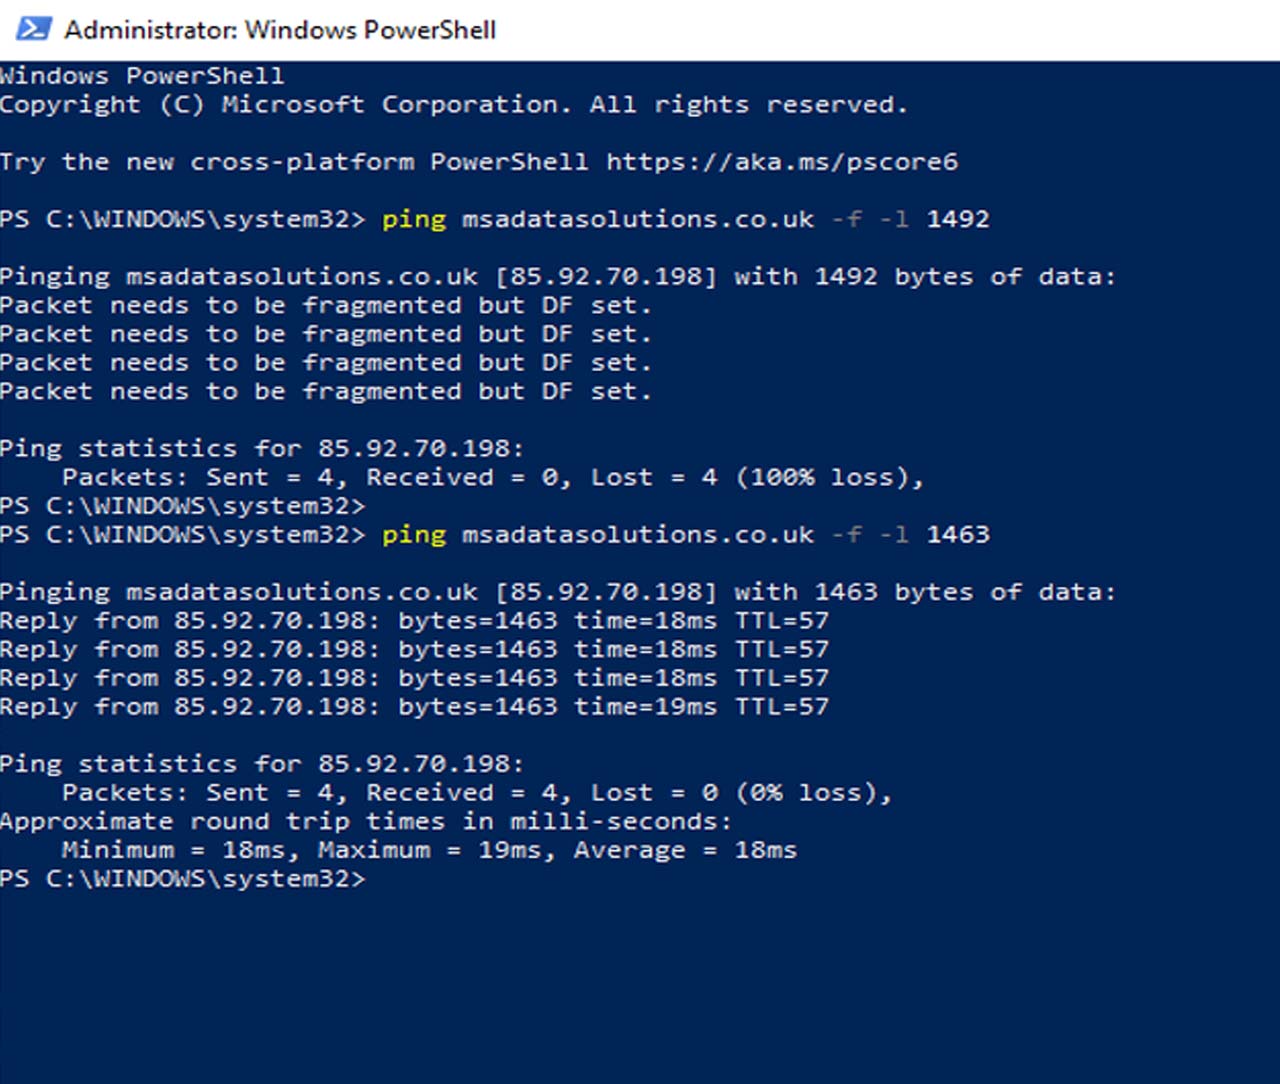
To calculate the actual MTU size that your system can handle you need to input the following command line without the quotes:
“ping msadatasolutions.co.uk -f -l 1492” you will then need to keep adjusting the value (in this case “1492”) until you see a 0% Loss (as an example ours showed 0% loss in at 1463)
Now you take that figure (in our case 1463) and add 28, this will give you the correct MTU size, (in our case the correct size would be 1491)
Next we need to tell our system to use that value
Ideally the MTU value should be set at the router level so that everything connected to your network can use this setting, however, some routers don’t have that facility.
So let’s access our router to see if the setting is available, if you don’t know your routers gateway or login details you can use the “ipconfig” command in a dos window or via the PowerShell with admin privileges: Use WIN+R then run: “ipconfig” this will give you your default gateway which you should then type into the address bar of your browser, the most common are 192.168.1.1 – 192.168.1.0 – 192.168.0.1
Now that you have accessed your router you need to look for “Internet Settings”
if your router allows you to make changes to the MTU then all you need to do is move the MTU from “Auto” to “Manual” (the default MTU size should be 1500) then you simply type in the MTU value that you worked out earlier (in our case this would be 1491) and click on “Apply” now everything that is going through that router is going to get that setting…..
If you cannot access the MTU on your router you can manually set it on your devices using the following command line without the quotes:
“netsh int ipv4 set subinterface “Ethernet” mtu=1491 store=persistent”
After resetting the value, when I run “netsh interface ipv4 show subinterfaces” it shows our MTU as 1491
It is worth noting that the majority of modern networks are fast enough and reliable enough that for most applications an MTU of between 1450 and 1500 works okay, and remember that tweaking the MTU doesn’t always increase your internet speed but can in some cases increase reliability by reducing the amount of lost or fragmented packets.


